كل ما نحتاجه هو 2 DC سيارات، سائق L298N، لوحة اردوينو وعصا التحكم لعنصر التحكم. أما بالنسبة لإمدادات الطاقة، واخترت أن استخدام ثلاثة 3.7V بطاريات ليثيوم أيون، وتوفير مجموعه 11V. أنا جعلت الهيكل من 3 مم القراد الخشب الرقائقي، وتعلق المحركات إليها باستخدام الأقواس المعدنية، عجلات تعلق على المحركات وأمام إرفاق عجلة دوارة.
مكونات الاساسية :
- Arduino UNO R3
- H-bridge L298N
- Module joystick
- DC Motor And Gearbox
- 7.4v battery
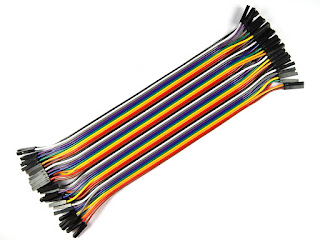
- Jumper wires
++ مخطط الرسم البياني :
#define enA 9
#define in1 4
#define in2 5
#define enB 10
#define in3 6
#define in4 7
int motorSpeedA = 0;
int motorSpeedB = 0;
void setup() {
pinMode(enA, OUTPUT);
pinMode(enB, OUTPUT);
pinMode(in1, OUTPUT);
pinMode(in2, OUTPUT);
pinMode(in3, OUTPUT);
pinMode(in4, OUTPUT);
}
void loop() {
int xAxis = analogRead(A0); // Read Joysticks X-axis
int yAxis = analogRead(A1); // Read Joysticks Y-axis
// Y-axis used for forward and backward control
if (yAxis < 470) {
// Set Motor A backward
digitalWrite(in1, HIGH);
digitalWrite(in2, LOW);
// Set Motor B backward
digitalWrite(in3, HIGH);
digitalWrite(in4, LOW);
// Convert the declining Y-axis readings for going backward from 470 to 0 into 0 to 255 value for the PWM signal for increasing the motor speed
motorSpeedA = map(yAxis, 470, 0, 0, 255);
motorSpeedB = map(yAxis, 470, 0, 0, 255);
}
else if (yAxis > 550) {
// Set Motor A forward
digitalWrite(in1, LOW);
digitalWrite(in2, HIGH);
// Set Motor B forward
digitalWrite(in3, LOW);
digitalWrite(in4, HIGH);
// Convert the increasing Y-axis readings for going forward from 550 to 1023 into 0 to 255 value for the PWM signal for increasing the motor speed
motorSpeedA = map(yAxis, 550, 1023, 0, 255);
motorSpeedB = map(yAxis, 550, 1023, 0, 255);
}
// If joystick stays in middle the motors are not moving
else {
motorSpeedA = 0;
motorSpeedB = 0;
}
// X-axis used for left and right control
if (xAxis < 470) {
// Convert the declining X-axis readings from 470 to 0 into increasing 0 to 255 value
int xMapped = map(xAxis, 470, 0, 0, 255);
// Move to left - decrease left motor speed, increase right motor speed
motorSpeedA = motorSpeedA - xMapped;
motorSpeedB = motorSpeedB + xMapped;
// Confine the range from 0 to 255
if (motorSpeedA < 0) {
motorSpeedA = 0;
}
if (motorSpeedB > 255) {
motorSpeedB = 255;
}
}
if (xAxis > 550) {
// Convert the increasing X-axis readings from 550 to 1023 into 0 to 255 value
int xMapped = map(xAxis, 550, 1023, 0, 255);
// Move right - decrease right motor speed, increase left motor speed
motorSpeedA = motorSpeedA + xMapped;
motorSpeedB = motorSpeedB - xMapped;
// Confine the range from 0 to 255
if (motorSpeedA > 255) {
motorSpeedA = 255;
}
if (motorSpeedB < 0) {
motorSpeedB = 0;
}
}
// Prevent buzzing at low speeds (Adjust according to your motors. My motors couldn't start moving if PWM value was below value of 70)
if (motorSpeedA < 70) {
motorSpeedA = 0;
}
if (motorSpeedB < 70) {
motorSpeedB = 0;
}
analogWrite(enA, motorSpeedA); // Send PWM signal to motor A
analogWrite(enB, motorSpeedB); // Send PWM signal to motor B
}
#arduino #raspberrypi #electronics #arduinoproject #robotics #technology #engineering #arduinouno #robot #iot #diy #electrical #maker #programming #electronic #microcontroller #arduinoprojects #tech #esp #pcb #arduinomega #d #electricalengineering #robotica #diyelectronics #project #coding #arduinofun #sensor


No comments:
Post a Comment