في هذا البرنامج التعليمي من Arduino ، سوف نتعلم كيفية التحكم في محركات التيار المستمر باستخدام Arduino. نلقي نظرة جيدة على بعض التقنيات الأساسية للتحكم في محركات التيار المستمر ونقدم مثالين نتعلم من خلاله كيفية التحكم في محركات التيار المستمر باستخدام برنامج التشغيل L298N ولوحة Arduino.
كل ما نحتاجه هو 2 DC Motors و L298N driver ولوحة Arduino وعصا التحكم للتحكم. بالنسبة لمصدر الطاقة ، اخترت استخدام ثلاث بطاريات Li-ion بقوة 3.7 فولت ، مما يوفر إجمالي 11 فولت. لقد صنعت الهيكل من الخشب الرقائقي بقياس 3 مم ، وربطت المحركات به باستخدام أقواس معدنية ، وعجلات متصلة بالمحركات وفي المقدمة عجلة دوارة.
المكونات الاساسية :
- Arduino UNO
- H-Bridge Motor Driver L298N
- Gear Motor 2 Psc
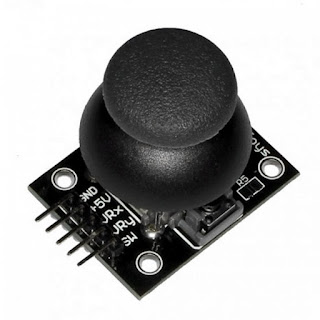
- joystick
- battery 7.4
- Jumper wires
++ مخطط الرسم البياني :
++ الكود البرمجي هنا :
#define enA 9
#define in1 4
#define in2 5
#define enB 10
#define in3 6
#define in4 7
int motorSpeedA = 0;
int motorSpeedB = 0;
void setup() {
pinMode(enA, OUTPUT);
pinMode(enB, OUTPUT);
pinMode(in1, OUTPUT);
pinMode(in2, OUTPUT);
pinMode(in3, OUTPUT);
pinMode(in4, OUTPUT);
}
void loop() {
int xAxis = analogRead(A0); // Read Joysticks X-axis
int yAxis = analogRead(A1); // Read Joysticks Y-axis
// Y-axis used for forward and backward control
if (yAxis < 470) {
// Set Motor A backward
digitalWrite(in1, HIGH);
digitalWrite(in2, LOW);
// Set Motor B backward
digitalWrite(in3, HIGH);
digitalWrite(in4, LOW);
// Convert the declining Y-axis readings for going backward from 470 to 0 into 0 to 255 value for the PWM signal for increasing the motor speed
motorSpeedA = map(yAxis, 470, 0, 0, 255);
motorSpeedB = map(yAxis, 470, 0, 0, 255);
}
else if (yAxis > 550) {
// Set Motor A forward
digitalWrite(in1, LOW);
digitalWrite(in2, HIGH);
// Set Motor B forward
digitalWrite(in3, LOW);
digitalWrite(in4, HIGH);
// Convert the increasing Y-axis readings for going forward from 550 to 1023 into 0 to 255 value for the PWM signal for increasing the motor speed
motorSpeedA = map(yAxis, 550, 1023, 0, 255);
motorSpeedB = map(yAxis, 550, 1023, 0, 255);
}
// If joystick stays in middle the motors are not moving
else {
motorSpeedA = 0;
motorSpeedB = 0;
}
// X-axis used for left and right control
if (xAxis < 470) {
// Convert the declining X-axis readings from 470 to 0 into increasing 0 to 255 value
int xMapped = map(xAxis, 470, 0, 0, 255);
// Move to left - decrease left motor speed, increase right motor speed
motorSpeedA = motorSpeedA - xMapped;
motorSpeedB = motorSpeedB + xMapped;
// Confine the range from 0 to 255
if (motorSpeedA < 0) {
motorSpeedA = 0;
}
if (motorSpeedB > 255) {
motorSpeedB = 255;
}
}
if (xAxis > 550) {
// Convert the increasing X-axis readings from 550 to 1023 into 0 to 255 value
int xMapped = map(xAxis, 550, 1023, 0, 255);
// Move right - decrease right motor speed, increase left motor speed
motorSpeedA = motorSpeedA + xMapped;
motorSpeedB = motorSpeedB - xMapped;
// Confine the range from 0 to 255
if (motorSpeedA > 255) {
motorSpeedA = 255;
}
if (motorSpeedB < 0) {
motorSpeedB = 0;
}
}
// Prevent buzzing at low speeds (Adjust according to your motors. My motors couldn't start moving if PWM value was below value of 70)
if (motorSpeedA < 70) {
motorSpeedA = 0;
}
if (motorSpeedB < 70) {
motorSpeedB = 0;
}
analogWrite(enA, motorSpeedA); // Send PWM signal to motor A
analogWrite(enB, motorSpeedB); // Send PWM signal to motor B
}
#arduino #raspberrypi #electronics #arduinoproject #robotics #technology #engineering #arduinouno #robot #iot #diy #electrical #maker #programming #electronic #microcontroller #arduinoprojects #tech #esp #pcb #arduinomega #d #electricalengineering #robotica #diyelectronics #project #coding #arduinofun #sensor


No comments:
Post a Comment